
Recently Updated
Reverse100-1
Highlighted techniques
- how to patch files in ghidra
- how to retype strings to make them readable in ghidra
- small gdb tutorial on how to set a breakpoint and skip the function with
jump
Learning the game
We are presented with a file called Reverse100-1. I run the file command against it:
Reverse100-1: ELF 64-bit LSB executable, x86-64, version 1 (SYSV), dynamically linked, interpreter /lib64/ld-linux-x86-64.so.2, BuildID[sha1]=9604fd8c1b649b4686112951a38c3b7280449fc5, for GNU/Linux 3.2.0, not stripped
it seems to be an ELF file, so I’ll be running it with my docker debian container.
1
2
## ./Reverse100-1
Encoded flag: ΑΑ̠ȗ̠̍ʠȍȗ
The program seems to be printing out the flag after it has had some sort of transformation applied, time to put on the gloves.
Playing the game
Alright time to get a bit more serious, I’ll be showcasing two ways to solve this, by performing dynamic and static analysis.
For the sake of understanding we’ll start by looking at the program through the eyes of the dragon (ghidra, you guessed correctly)
We saw from the file command that this program is not stripped so ghidra should have plenty of information to work with.
decompiled “main” function
1
2
3
4
5
6
7
8
9
10
11
12
13
14
15
16
17
18
undefined8 main(void)

{
  undefined8 local_38;
  undefined8 local_30;
  undefined8 local_28;
  undefined7 local_20;
  undefined4 uStack_19;

  local_38 = 0x77757b6674636f70;
  local_30 = 0x31775f6e315f7073;
  local_28 = 0x33723368375f336e;
  local_20 = 0x7572375f35315f;
  uStack_19 = 0x7d6837;
  obfuscate(&local_38);
  printf("Encoded flag: %s\n",&local_38);
  return 0;
}
Hmm… Okay so let’s break it down:
- first of all we can see a bunch of weird variables with unrecognized types being defined, we’ll come back to it later
- after that we have a call to
obfuscate()with a pointer tolocal_38(one of our weird variables) being passed as an argument - then we have the following call
printf("Encoded flag: %s\n",&local_38);
So we can clearly guess that the last two lines we identified are obfuscating/encoding the flag and then printing it, also the obfuscation is performed in place since both the obfuscation function and the print function receive the same pointer.
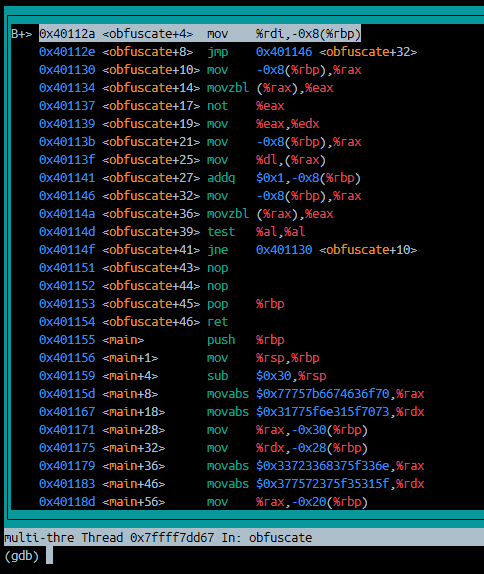
Let’s solve the mistery of those weird variables, you may have already guessed that they are actually meant to be a single variable, a string, the flag. Why does ghidra show us a long string like this? Well because the disassembly looks like this:
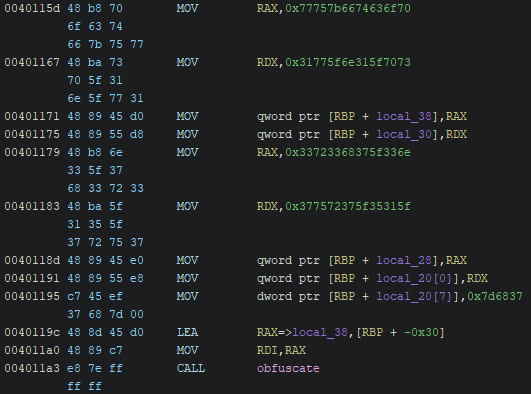
As you can see there are a bunch of weird values being moved into registers, ghidra sees each of these as a new variable, but we can solve that.
How to spoon feed a string to Ghidra
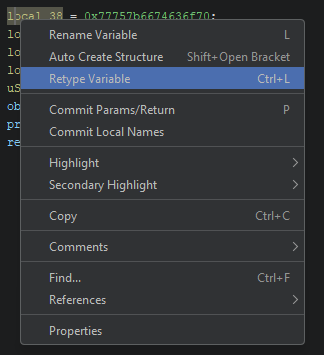
- Right click the first variable generated and look for the “Retype Variable” option (or do Ctrl+L)
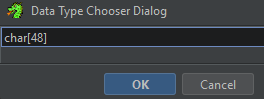
- Retype it to
char[n]wherenis the amount of characters in the desired string, to get that you can add up how many bytes each of the variables you want to merge is using, but in this case since we only have this string as a variable we can check the function prologue to know how many bytes we need (remember that values in the disassembly are in hex)

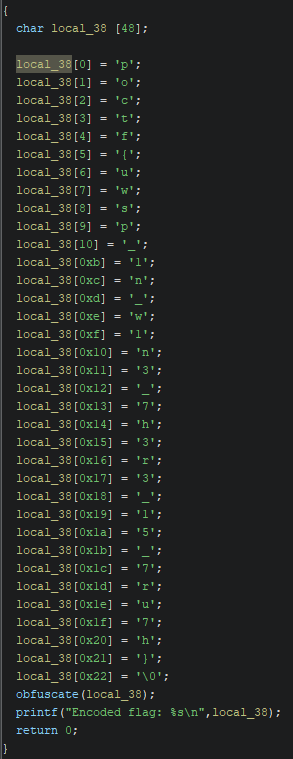
It’s not perfect but a lot more readable than before, with this we could already reconstruct the entire flag by hand.
What if I don’t want to rebuild the flag like a LEGO?
Okay then you could create a script for ghidra that gets the variable and reconstructs it… Okay let’s just see how to patch the program to make the obfuscation never happen.
- We go to the call to
obfuscatein the disassembly and look for thePatch Instructionoption (or use Ctrl+shift+G)
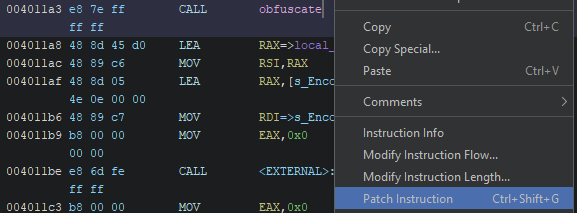
- We’ll patch it so it becomes a
NOPinstruction, I don’t know if there’s aNOPinstruction that is long enough but I just added two of them

after this we can export the program and run it.
- press
Oto export the program, select “Original File”, change it’s name and then click “Ok”
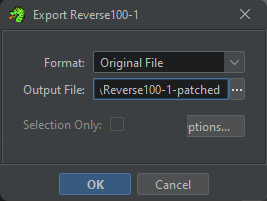
- after this you can run your patched file.

Extra: How to do it all from the terminal and feel like a superhero
Lastly I’ll show you how to solve this from a linux terminal (bash) using gdb (dynamic analysis).
- run the program with
gdb
1
gdb Reverse100-1
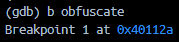
- set a breakpoint in the
obfuscatefunction (we can do this since the program has symbols left on it)
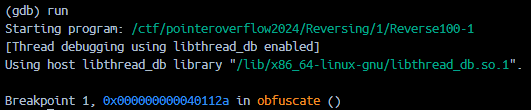
- Run the program and let it hit the breakpoint, let them come to us.
- Now, enter the matrix by enabling the disassembly layout
layout asm
- From here we can see everything, and by everything I mean that we can see the instruction we are currently about to execute and what follows. Let’s show a bit more of our power and
jumpstraight to the prologue of the function, ignoring the rest of the instructions.
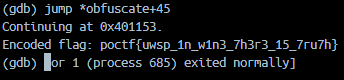
BOOM!!
Got ‘em, they don’t even know what hit them ;)
Flag
poctf{uwsp_1n_w1n3_7h3r3_15_7ru7h}